cPanel Domains
Addon Domain is now known as Add a Domain in cPanel as they’ve recently updated the interface.
Difficulty Level: Easy
-
To add a new domain within cPanel, you’ll first need to login to your cPanel account.
-
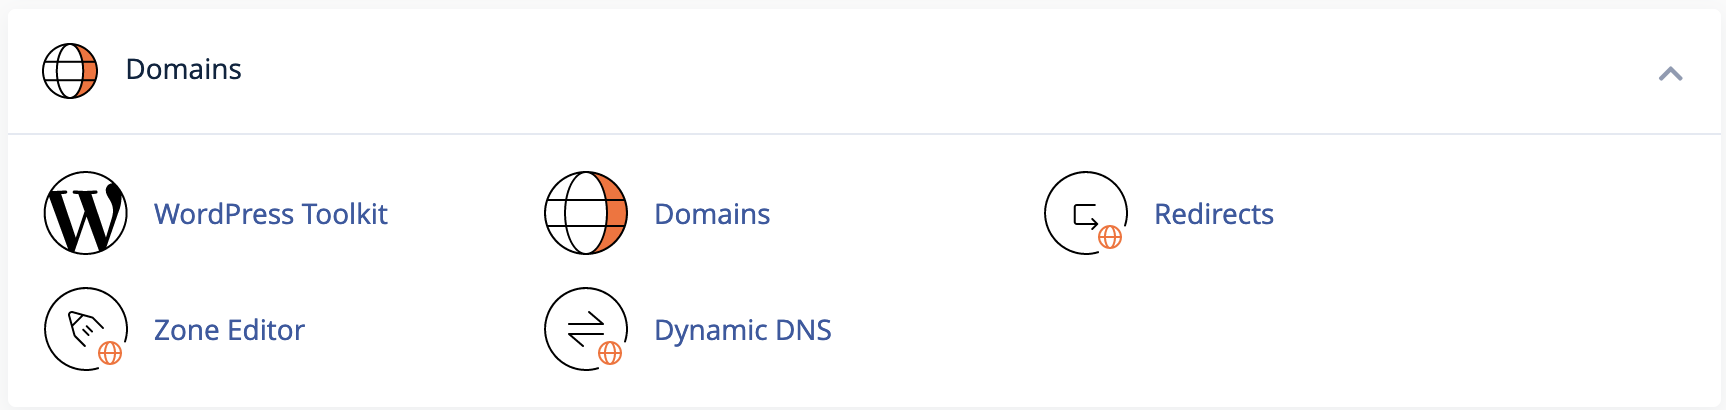
Next, go to the Domains section and click on Domains. Keep in mind that some packages may be limited to a certain number of Domains that you can add.
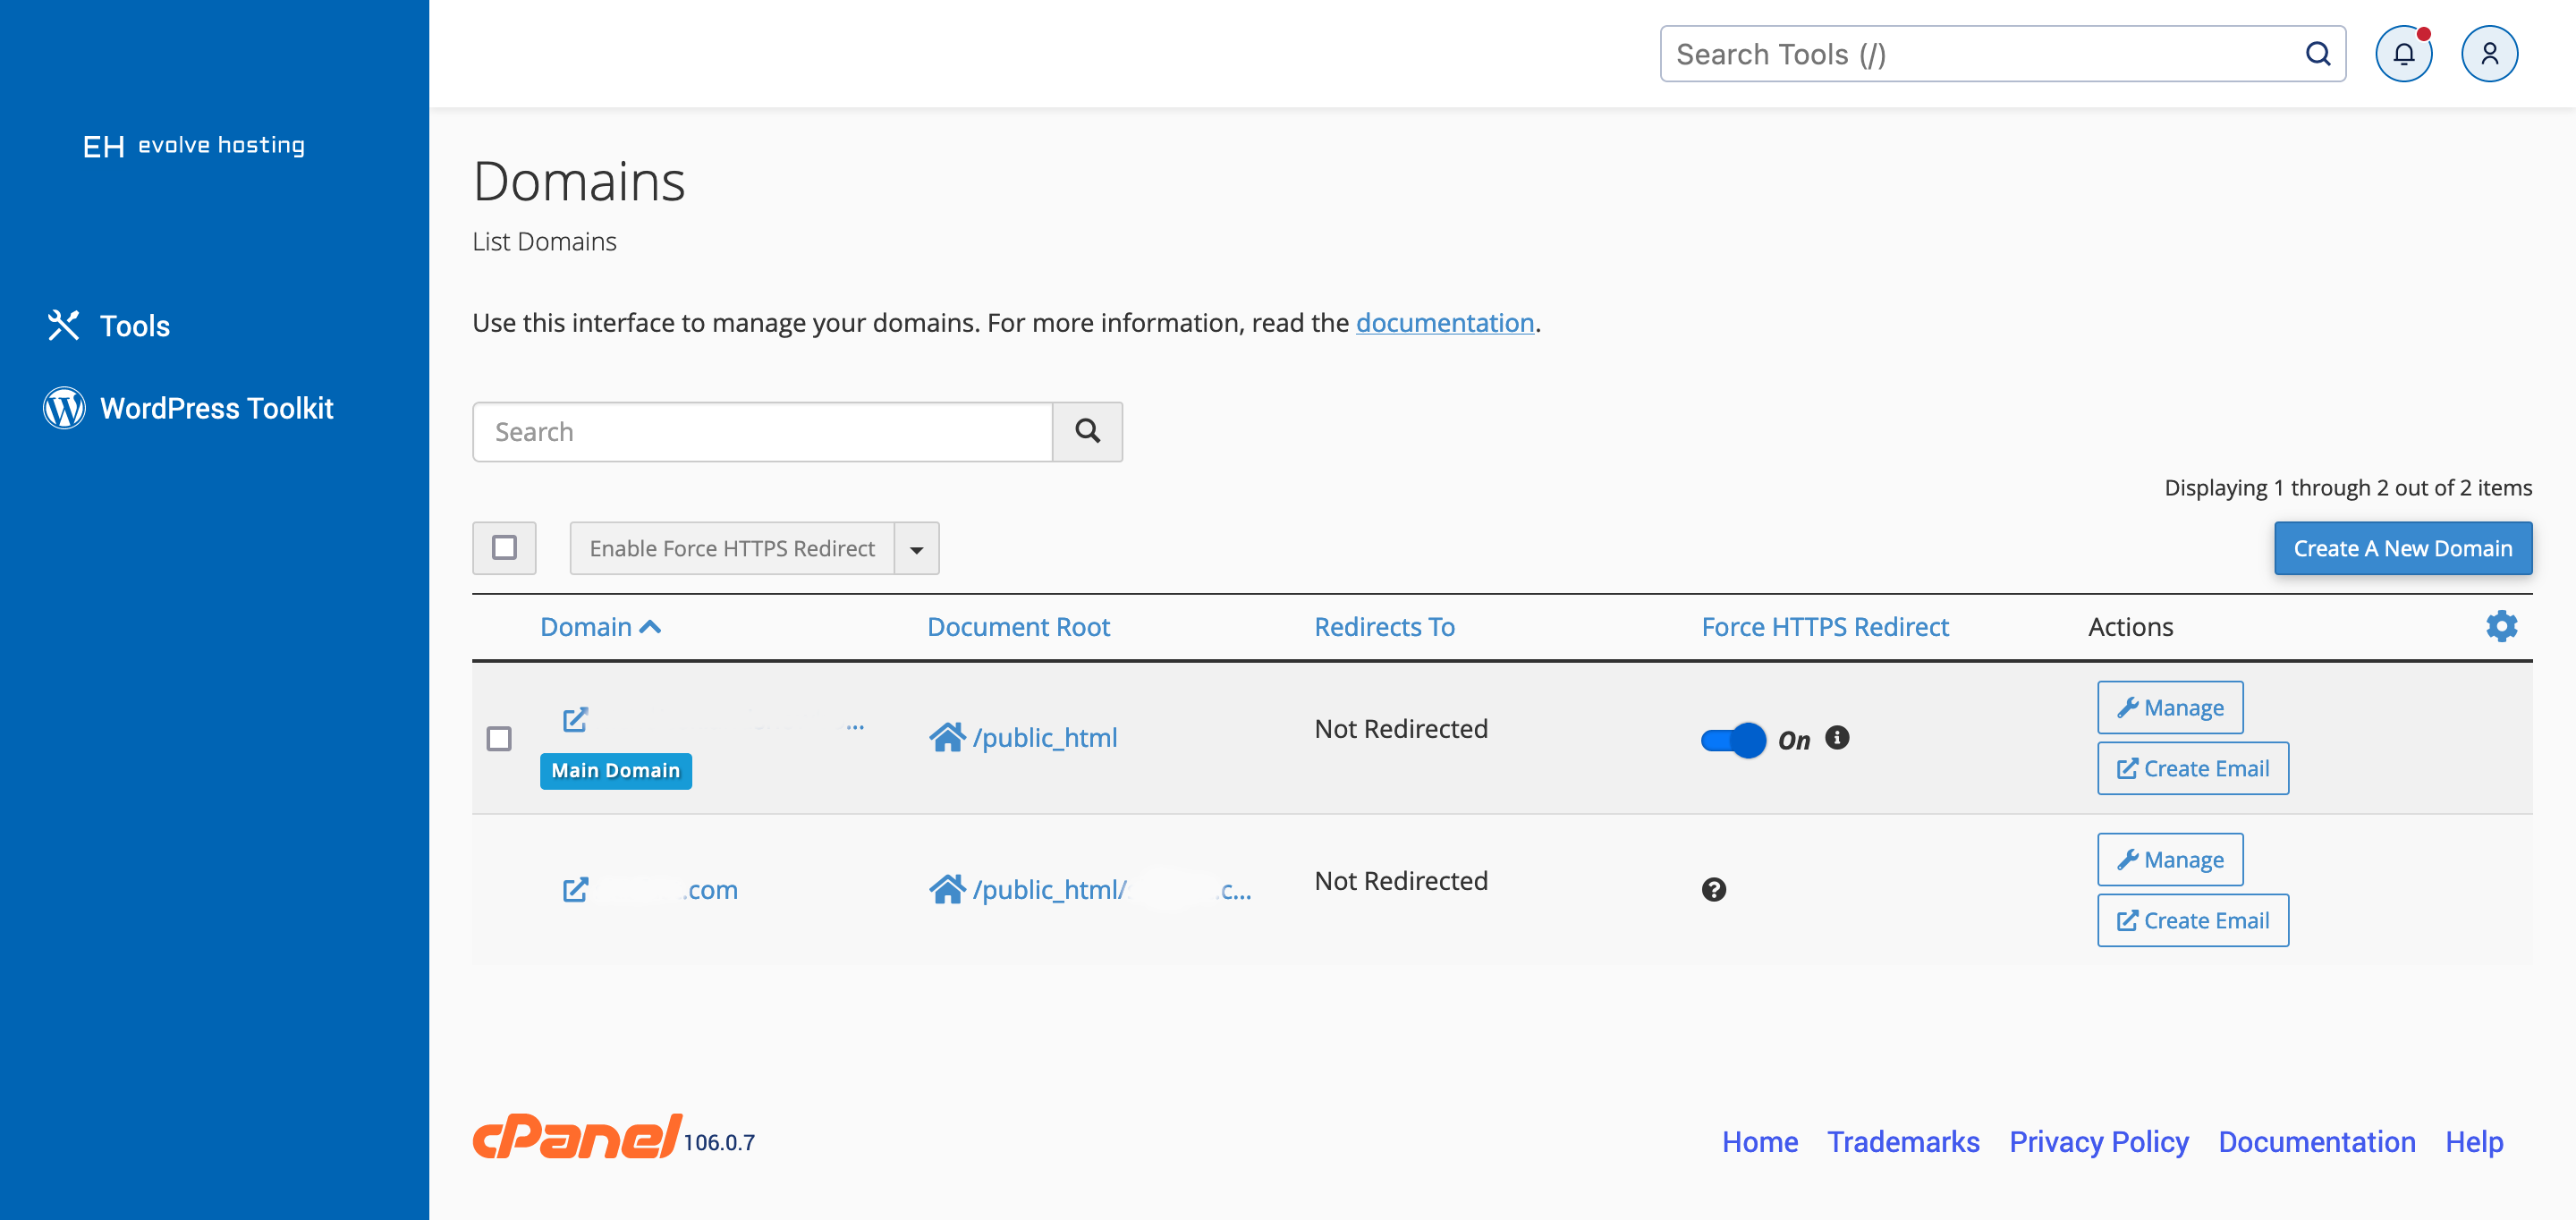
- Once you see the screen below, click on the blue button that says create a new domain off to the right side of your screen.
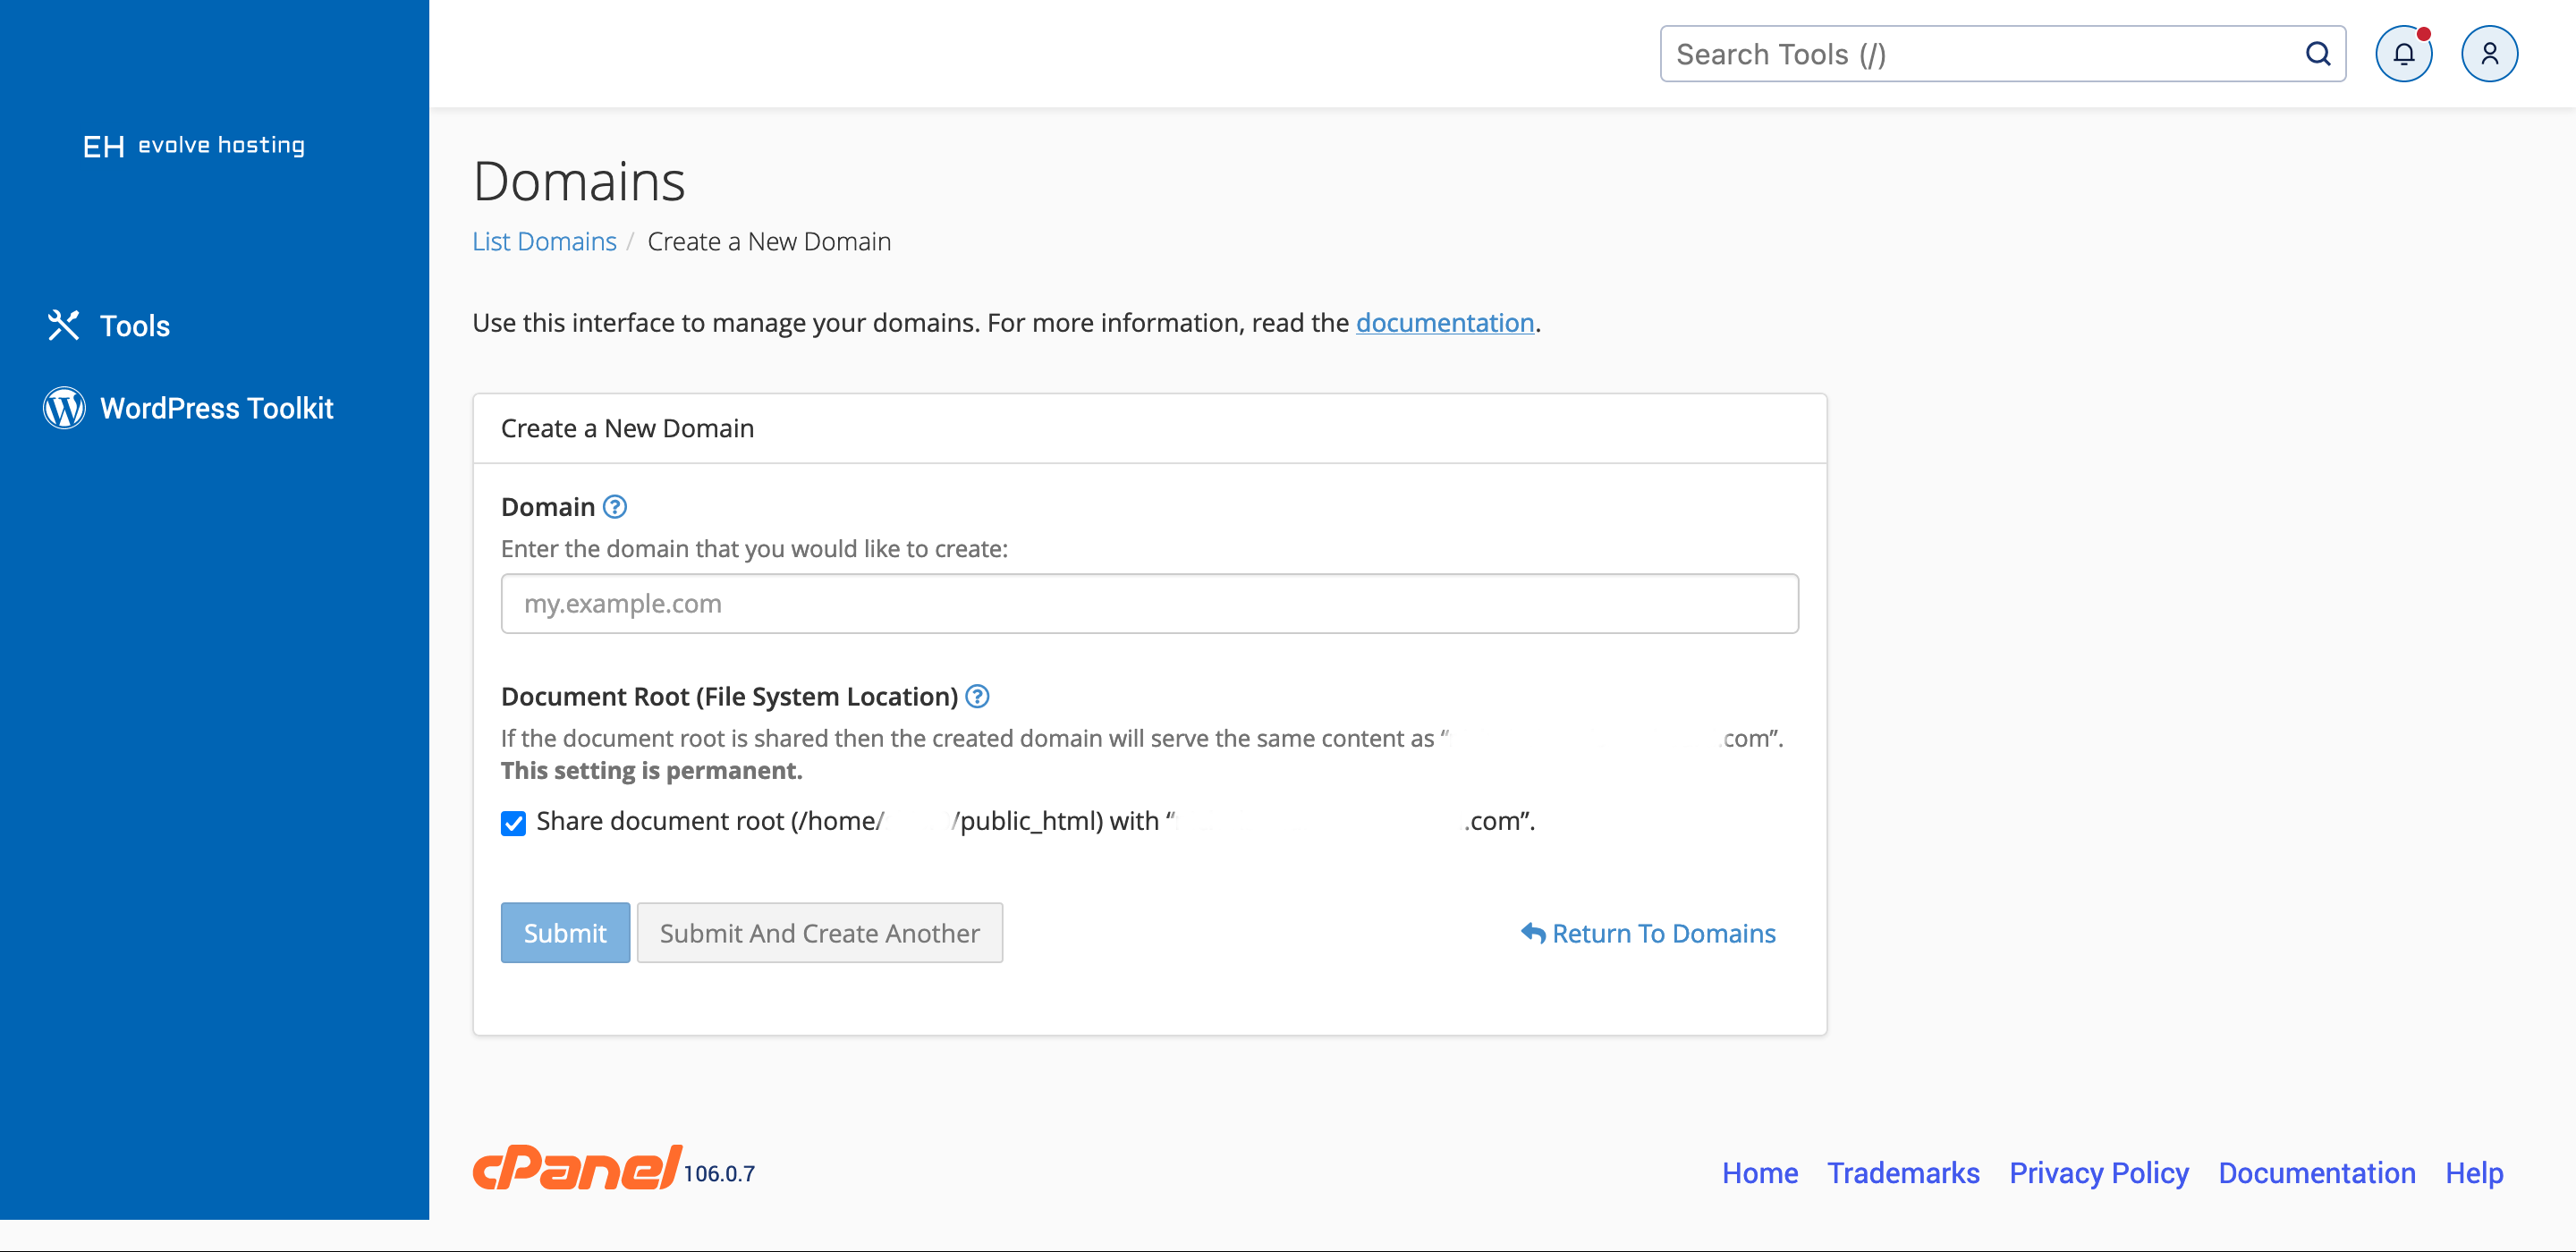
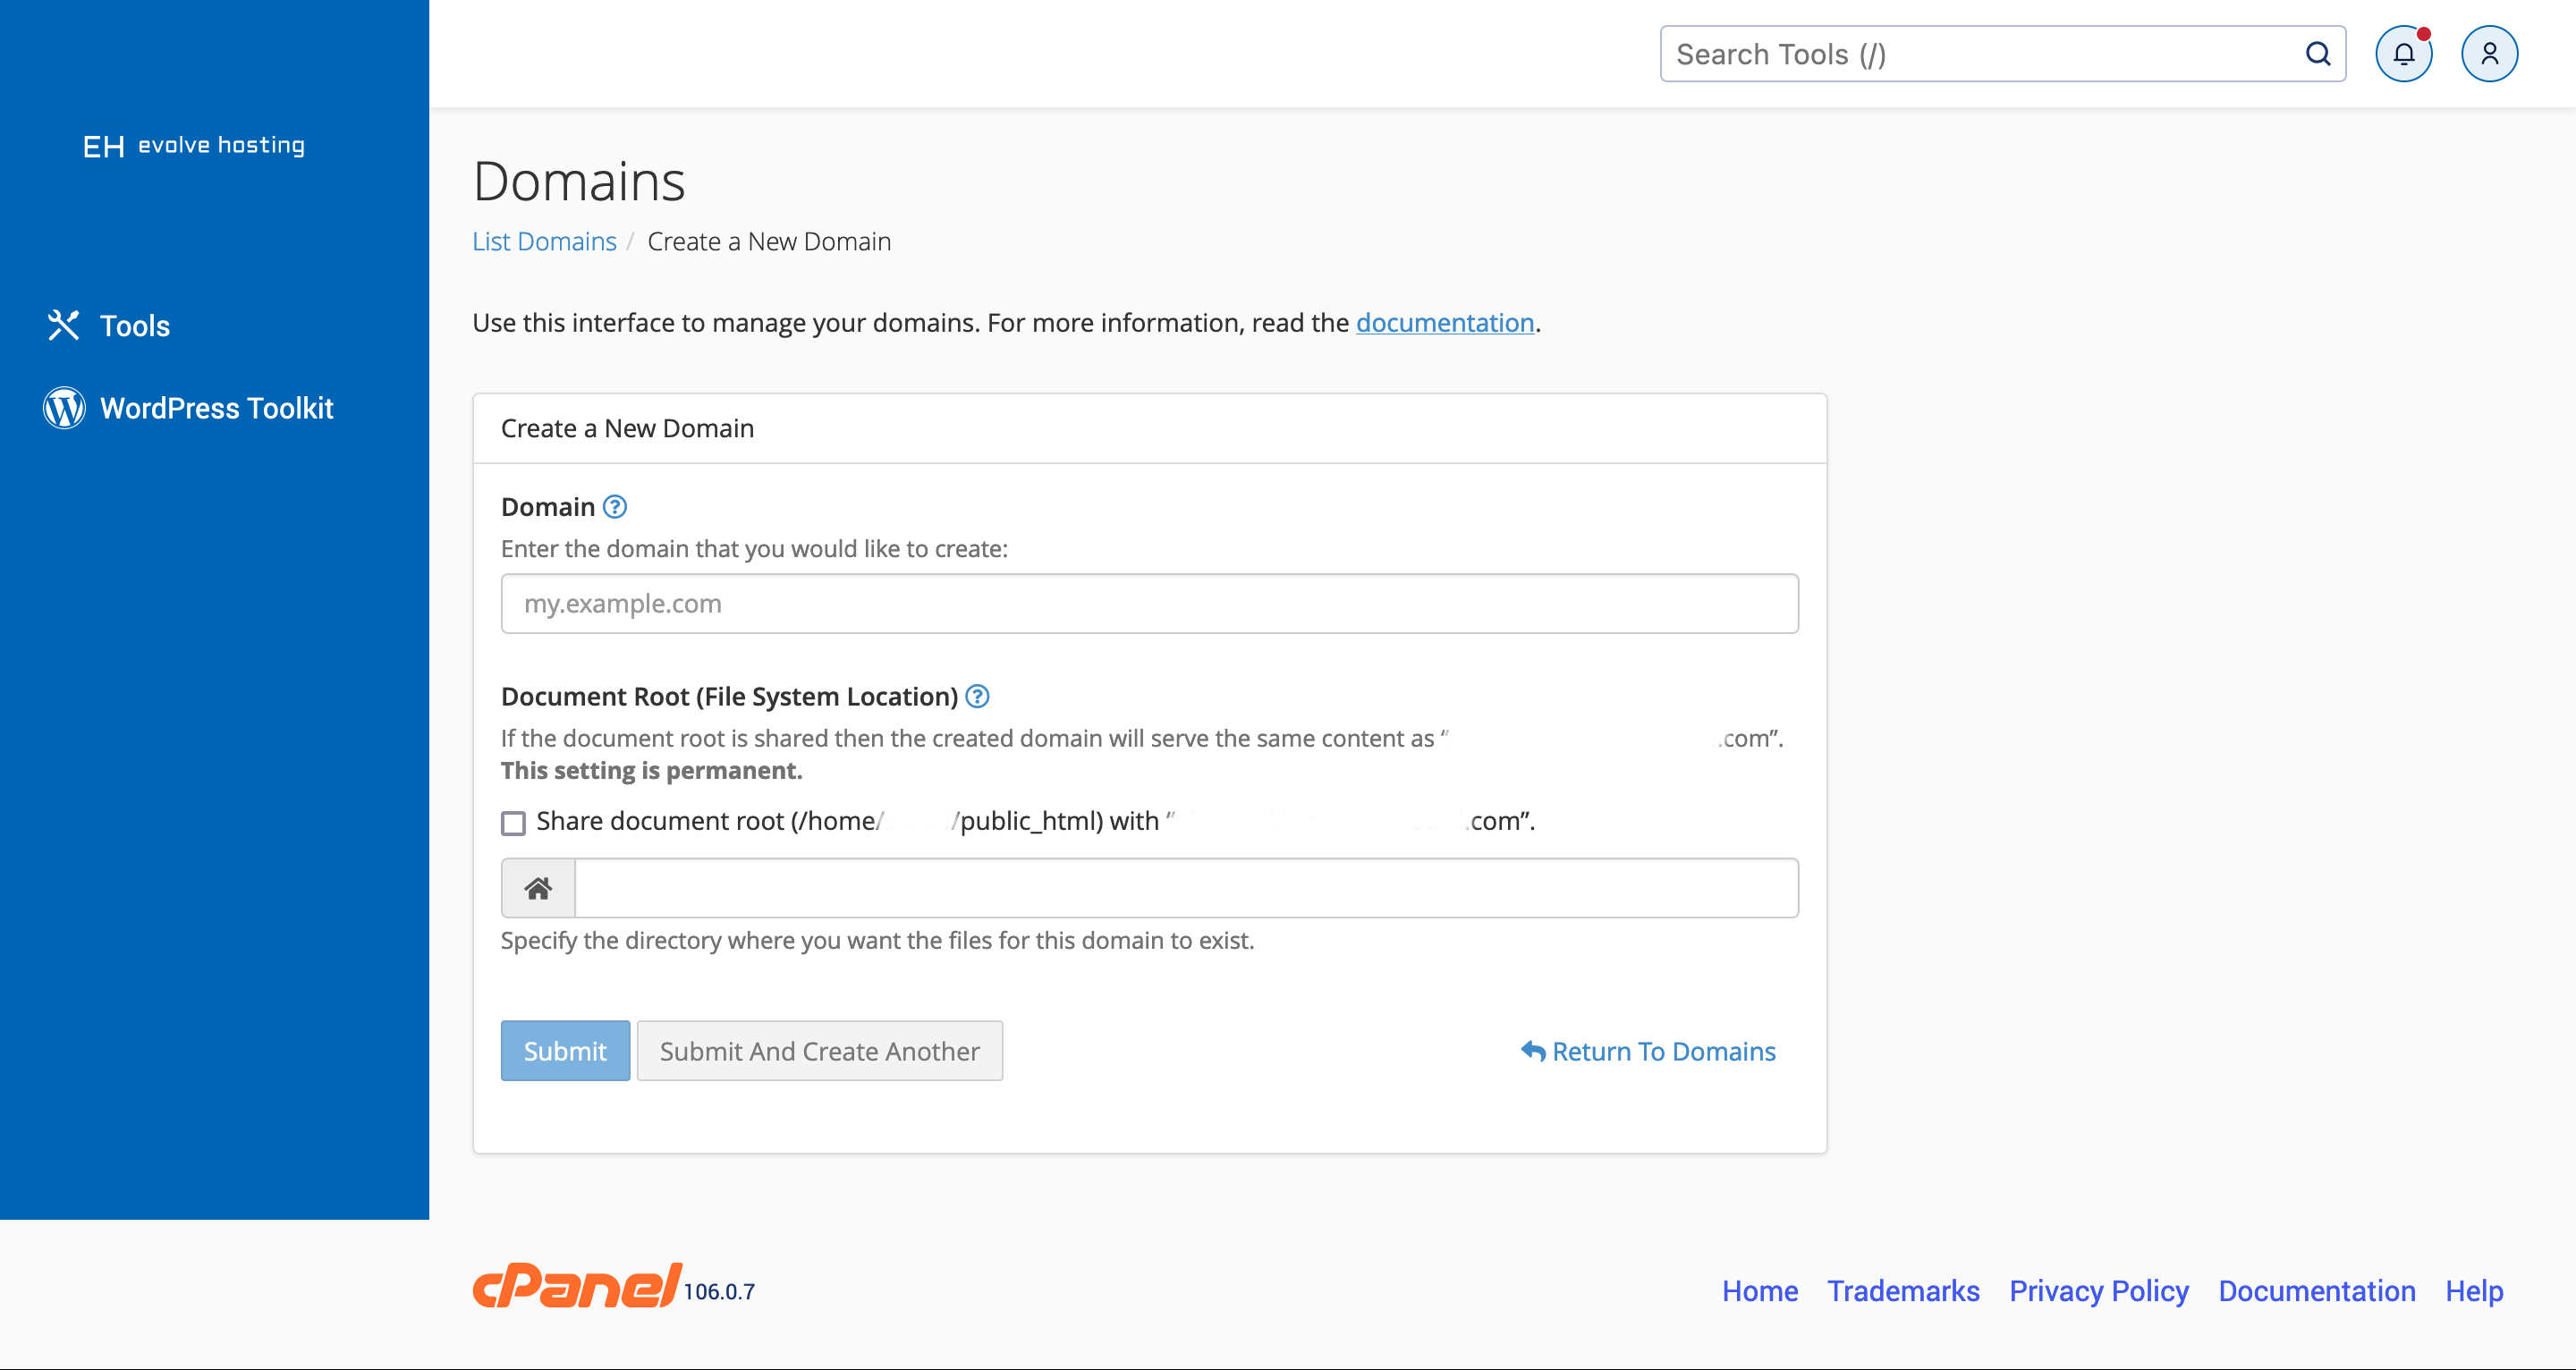
- Next, you will see the screen below to add a new domain (if your hosting plan allows for it).
Document Root (File System Location)
The Document Root setting is VERY important.
More than likely, you already have a website uploaded to /home/your_cpanel_username/public_html so we suggest unchecking this box. As soon as you uncheck the box, you’ll be presented with the option to specify the location where you will upload files for this new domain to the server (shown in second image below). We suggest using the format of /home/your_cpanel_username/newdomain.com
This allows you to keep the files for the new domain separate from the files of the main domain (located in /home/cpanel_username/public_html) which helps keep you organized and it is a security best practice.
Once you are finished adding a new domain, make sure you Update Your Nameservers
If you need any assistance, please submit a ticket for Technical Support
If you need any assistance, please submit a ticket for Technical Support
Difficulty Level: Easy
To get started, you will need to login to cPanel. If you are not sure how to login to cPanel, take a look at this link first. How to Access cPanel
Once you are logged into cPanel, locate the Domains section of icons. Within this section, you will click on the icon that says Domains. Click this where you will be taken to the screen to add a new subdomain.
This is the next screen that you will see:
Click the blue button off to the right of your screen that says create a new domain
To create a subdomain, enter a new name followed by a period (.) and then the website’s domain. For example, enter subdomain.example.com to create a subdomain of example.com.
For the Document Root, it’s usually just best to allow cPanel to assign the value here which is /home/subdomain_name
Document Root (File System Location)
The Document Root setting is VERY important.
More than likely, you already have a website uploaded to /home/your_cpanel_username/public_html so we suggest unchecking this box. As soon as you uncheck the box, you’ll be presented with the option to specify the location where you will upload files for this new domain to the server (shown in second image). We suggest using the location of /home/your_cpanel_username/newdomain.com
This allows you to keep the files for the new domain separate from the files of the main domain (located in /home/cpanel_username/public_html) which helps keep you organized and it is a security best practice.
Click Submit. Now you can begin to upload files in that new directory.
If you need any assistance, please submit a ticket for Technical Support
Difficulty Level: Easy to Medium
Forcing all pages to load over HTTPS can be accomplished by the following steps. This does require that you have an SSL Certificate properly installed to work.
-
Connect to FTP or File Manager within cPanel and locate your .htaccess file. This is generally hidden and is commonly located in the
public_htmlfolder. -
Open the .htaccess file to edit
-
Locate ‘RewriteEngine On’ within your .htaccess file
-
Directly under RewriteEngine On add the following two lines of code:
# Add below RewriteEngine On within your .htaccess file
RewriteCond %{SERVER_PORT} ^80$
RewriteRule ^.*$ https://%{SERVER_NAME}%{REQUEST_URI} [R=301,L]
-
Save and re upload this file
-
Clear your browser cache and test
If you need any assistance, please submit a ticket for Technical Support